How to Browser Test your Nuxt.js applications with Playwright
Using Playwright to browser test your applications is pretty simple. In this guide we will create a nuxt app and will write some useful tests.
Table of Contents
Demo
- 🐱 Github
1. Requirements
For this tutorial you should have at least basic knowledge of vue.js and Nuxt.js.
We will use the following libraries
- Nuxt.js (Frontend Framework)
- Playwright (Testing Framework)
Important: The playwright documentation is one of the best I've ever read. I recommend to have it always open and search for the needed use case.
2. Install
First install a fresh nuxt project
npx create-nuxt-app my-cool-project

✨  Generating Nuxt.js project in nuxt-playwright-storyblok
? Project name: nuxt-playwright-storyblok
? Programming language: JavaScript
? Package manager: Yarn
? UI framework: Tailwind CSS
? Nuxt.js modules: (Press <space> to select, <a> to toggle all, <i> to invert selection)
? Linting tools: ESLint
? Testing framework: None
? Rendering mode: Universal (SSR / SSG)
? Deployment target: Server (Node.js hosting)
? Development tools: jsconfig.json (Recommended for VS Code if you're not using typescript)
? Continuous integration: None
? Version control system: None
2. Prepare your app
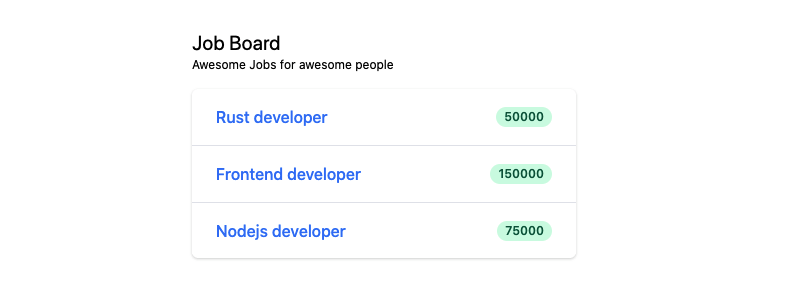
We build a simple job board. You can copy the code below or bring your own.
First build a reusable component called JobItem.vue
- 📝
componens/JobItem.vue
<template>
  <li>
    <nuxt-link :to="link" class="block hover:bg-gray-50">
      <div class="px-4 py-4 sm:px-6">
        <div class="flex items-center justify-between">
          <p class="text-md font-medium text-blue-500 truncate">
            {{ title }}
          </p>
          <div class="ml-2 flex-shrink-0 flex">
            <p class="px-2 inline-flex text-xs leading-5 font-semibold rounded-full bg-green-100 text-green-800">
              {{ salary }}
            </p>
          </div>
        </div>
      </div>
    </nuxt-link>
  </li>
</template>
<script>
export default {
  props:
    {
      title: {
        type: String,
        default: ''
      },
      salary: {
        type: String,
        default: ''
      },
      link: {
        type: String,
        default: ''
      }
    }
}
</script>
Then we iterate through some test data and use the JobItem component as template.
- 📝
pages/index.vue
<template>
  <div class="max-w-sm mx-auto mt-8">
    <div>
      <h2 class="text-xl">
        Job Board
      </h2>
      <span class="text-xs block pb-4">Awesome Jobs for awesome people</span>
    </div>
    <div class="shadow overflow-hidden sm:rounded-md">
      <ul id="job-list" role="list" class="divide-y divide-gray-200">
        <JobItem v-for="job in jobs" :key="job.title" :title="job.title" :salary="job.salary" :link="job.link" />
      </ul>
    </div>
  </div>
</template>

<script>
export default {
  data () {
    return {
      jobs: [
        {
          title: 'Rust developer',
          salary: '50000',
          link: '/job/rust-developer'
        },
        {
          title: 'Frontend developer',
          salary: '150000',
          link: '/job/frontend-developer'
        },
        {
          title: 'Nodejs developer',
          salary: '75000',
          link: '/job/nodejs-developer'
        }
      ]
    }
  }
}
</script>
Run the app. 🙌
yarn devOpen the app in browser (usually localhost:3000).

No we're ready for some testing.
3. Setup your test enviroment
Create the following folder structure to setup our test infrastructure.
project/
--| test/
-----| e2e
-----| unit
For a test run we need to add a test script to package.json
  "scripts": {
    // other entries
    "test": "npx playwright test"
  },
You can always run your tests with
yarn test3.1 Using the playwright test runner (recommend)
Instead of using nuxt/test-utils at all we could just build our own e2e test setup with playwright test runner. This refers to browser testing not unit testing. Jest is recommend for unit testing.
There are some advantages over the previous approach:
- it is faster
- very similar API, easy to grasp
- is able to run test concurrently in all three browsers:
npx playwright test --browser=all - does not suffer from transformIgnorePatterns issue (unfortunately jest is ignorant with this one)
- uses TypeScript without any additional setup
- plus all the goodies one could get from Playwright (for instance, incredibly easy to mock network request)
Credits to mrazauskas. See Github comment.
We need additional libraries here
yarn add -D playwright @playwright/test typescript A minimal tsconfig.json in the root dir
- 📝
tsconfig.json
{
    "compilerOptions": {
        "baseUrl": ".",
        "moduleResolution": "node",
        "esModuleInterop": true,
        "resolveJsonModule": true,
        "types": [
            "node",
            "jest"
        ],
        "allowJs": true
    },
    "exclude": [
        "**/dist/**",
        "**/node_modules/**"
    ]
}
3.2 Write our first test
We will write our test in the page.spec.ts file.
- 📝
test/e2e/page.spec.ts
import { test, expect } from '@playwright/test'

test('job board test', async ({ page, baseURL }) => {
  await page.goto(baseURL + '/') // <-- Nuxt app is running and route '/' is showing.

  // Step 1 - Is Homepage working
  await expect(page.locator('h1').locator('text=Job Board')).toBeVisible()
})
If you run the test again you will see some output like this:
Running 1 test using 1 worker

  ✓  test/e2e/page.spec.ts:4:1 › testing index with title (586ms)
4 Using playwright for browser testing
Until yet we just have tested if the app is "alive" on start. Now lets test if our job board app behaves as expected.
4.1 Check if your job list has entries
- We need to locate the DOM element in our test. So lets add an id
#job-listattribute to theulelement.
- 📝
pages/index.vue
    ...

    <div class="shadow overflow-hidden sm:rounded-md">
+      <ul id="job-list" role="list" class="divide-y divide-gray-200">
        <JobItem v-for="job in jobs" :key="job.title" :title="job.title" :salary="job.salary" :link="job.link" />
      </ul>
    </div>

...- 📝
test/e2e/page.spec.ts
import { resolve, join } from 'path'
import { test, expect } from '@playwright/test'

// Locate the screenshot dir
const ROOT_PATH = resolve(__dirname, 'screenshots')

test('job board test', async ({ page, baseURL }) => {
  await page.goto(baseURL + '/')

  // ... other testing code

  // Step 2 - Job List has items
  // Count our job list and check if entries are given
  const jobListCount = page.locator('ul#job-list > li').count
  await expect(jobListCount).toBeGreaterThan(0)
})
You could also write the following test to check a minimum size of entries
  // alternative
  const jobListItem = await page.locator('ul#job-list > li')
  await jobListItem.evaluateAll((lis, min) => lis.length >= min, 0)
4.2 Save screenshots for visual testing
With playwright you can create screenshots and even record videos for your apps. It's a one liner.
- Create a new folder
screenshotsintestdirectory
project/
--| test/
-----| e2e
--------| page.spec.ts
-----| screenshots
-----| unit- 📝
test/e2e/page.spec.ts
import { resolve, join } from 'path'
import { test, expect } from '@playwright/test'

// Locate the screenshot dir
const ROOT_PATH = resolve(__dirname, 'screenshots')

test('job board test', async ({ page, baseURL }) => {
  // ... other testing code

  // Step 3 - Create a screenshot of homepage
  // Save screenshot at CURRENT state in the testing process
  await page.screenshot({ path: join(ROOT_PATH, 'index-page.png') })
})
4.3 Testing your links and routes
For the next tests we want to check if our job list links are routing to the correct page. To continue we need to extend our app with a job detail page.
4.3.1 Create job detail page.
Create a nuxt dynamic page which will act as our job detail page.
project/
--| pages/
-----| job/
--------| _slug.vue
Here is the html for the detail page. As we focus on testing apps in this tutorial you can copy paste it.
- 📝
pages/job/_slug.vue
<template>
  <div
    class="max-w-sm mx-auto mt-8"
  >
    <nav aria-label="Back">
      <nuxt-link to="/" class="py-2 text-sm font-medium">
        Back to <b>Job Board</b>
      </nuxt-link>
    </nav>

    <div class="py-12">
      <h1 class="text-3xl">
        {{ job.title }}
      </h1>
      <p>
        {{ job.content }}
      </p>

      <span class="block mt-4">
        <span class="inline-flex items-center px-2.5 py-0.5 rounded-md text-sm font-medium bg-red-100 text-red-800">
          💰 {{ job.salary }} €
        </span>
      </span>

      <button type="button" class="mt-8 inline-flex items-center px-6 py-3 border border-transparent text-base font-medium rounded-full shadow-sm text-white bg-indigo-600 hover:bg-indigo-700 focus:outline-none focus:ring-2 focus:ring-offset-2 focus:ring-indigo-500">
        Apply now
      </button>
    </div>
  </div>
</template>

<script>
export default {
  data () {
    return {
      job: {
        title: 'Rust developer',
        salary: '50000',
        content: 'Lorem ipsum dolor sit amet, consetetur sadipscing elitr, sed diam nonumy eirmod tempor invidunt ut labore et dolore magna aliquyam erat, sed diam voluptua. '
      }
    }
  }
}
</script>
4.3.1 Test route and job linking
We decide to test the following: If you click on a link in one of the job list items you should get redirect to the detail page.
- 📝
test/e2e/page.spec.ts
import { resolve, join } from 'path'
import { test, expect } from '@playwright/test'

// Locate the screenshot dir
const ROOT_PATH = resolve(__dirname, 'screenshots')

test('job board test', async ({ page, baseURL }) => {
  // ... other testing code

  // Step 4 - Test if routing to detail page is working
  // Extract job title
  const jobTitle = await page.locator('ul#job-list > li:first-child p').first().textContent()

  // Extract href to get link
  const jobLink = await page.locator('ul#job-list > li:first-child > a')
  const href = await jobLink.getAttribute('href')

  // Step 5 - Click on the link and route to the detail page
  await jobLink.click()

  // Step 6 - Check if link is correct
  await expect(page).toHaveURL(href)

  // Step 7 - Test if the title is the same as from the list
  const heading1 = page.locator('h1')
  await expect(heading1).toHaveText(jobTitle)

  // Step 8 - Create a screenshot of detail page
  await page.screenshot({ path: join(ROOT_PATH, 'detail.png') })
})
That looks pretty good now. I won't go deeper here. Playwright has much more detail documentation how you can improve your tests and organize them.
I would suggest you look into the following concepts:
- Playwright: Page Object Model
- Playwright: Advanced: fixtures
- Playwright: Locator
4.4 Run your tests
Don't miss to run your test
yarn testRunning 1 test using 1 worker
✓ test/e2e/page.spec.ts:7:1 › testing index with title (967ms)
1 passed (1s)
✨ Done in 2.55s.5. Test automation
I was always afraid of automate testing and CI/CD process. Thought it's super complicated and there is some rocket science behind it. But no it's easier than someone might think.
With CI (Continuous Integration) you target a workflow in software development.
Imagine a team is working an app where each member is pushing code to the git repository. The code from each member is merged into a single branch (e.g. develop, master) which is then built and tested with automated workflows.
The advantage is that these workflows make sure everyone's code is well-tested, working properly and following the code rules. That's all for now.
5.1 Automate Tests with Github Actions
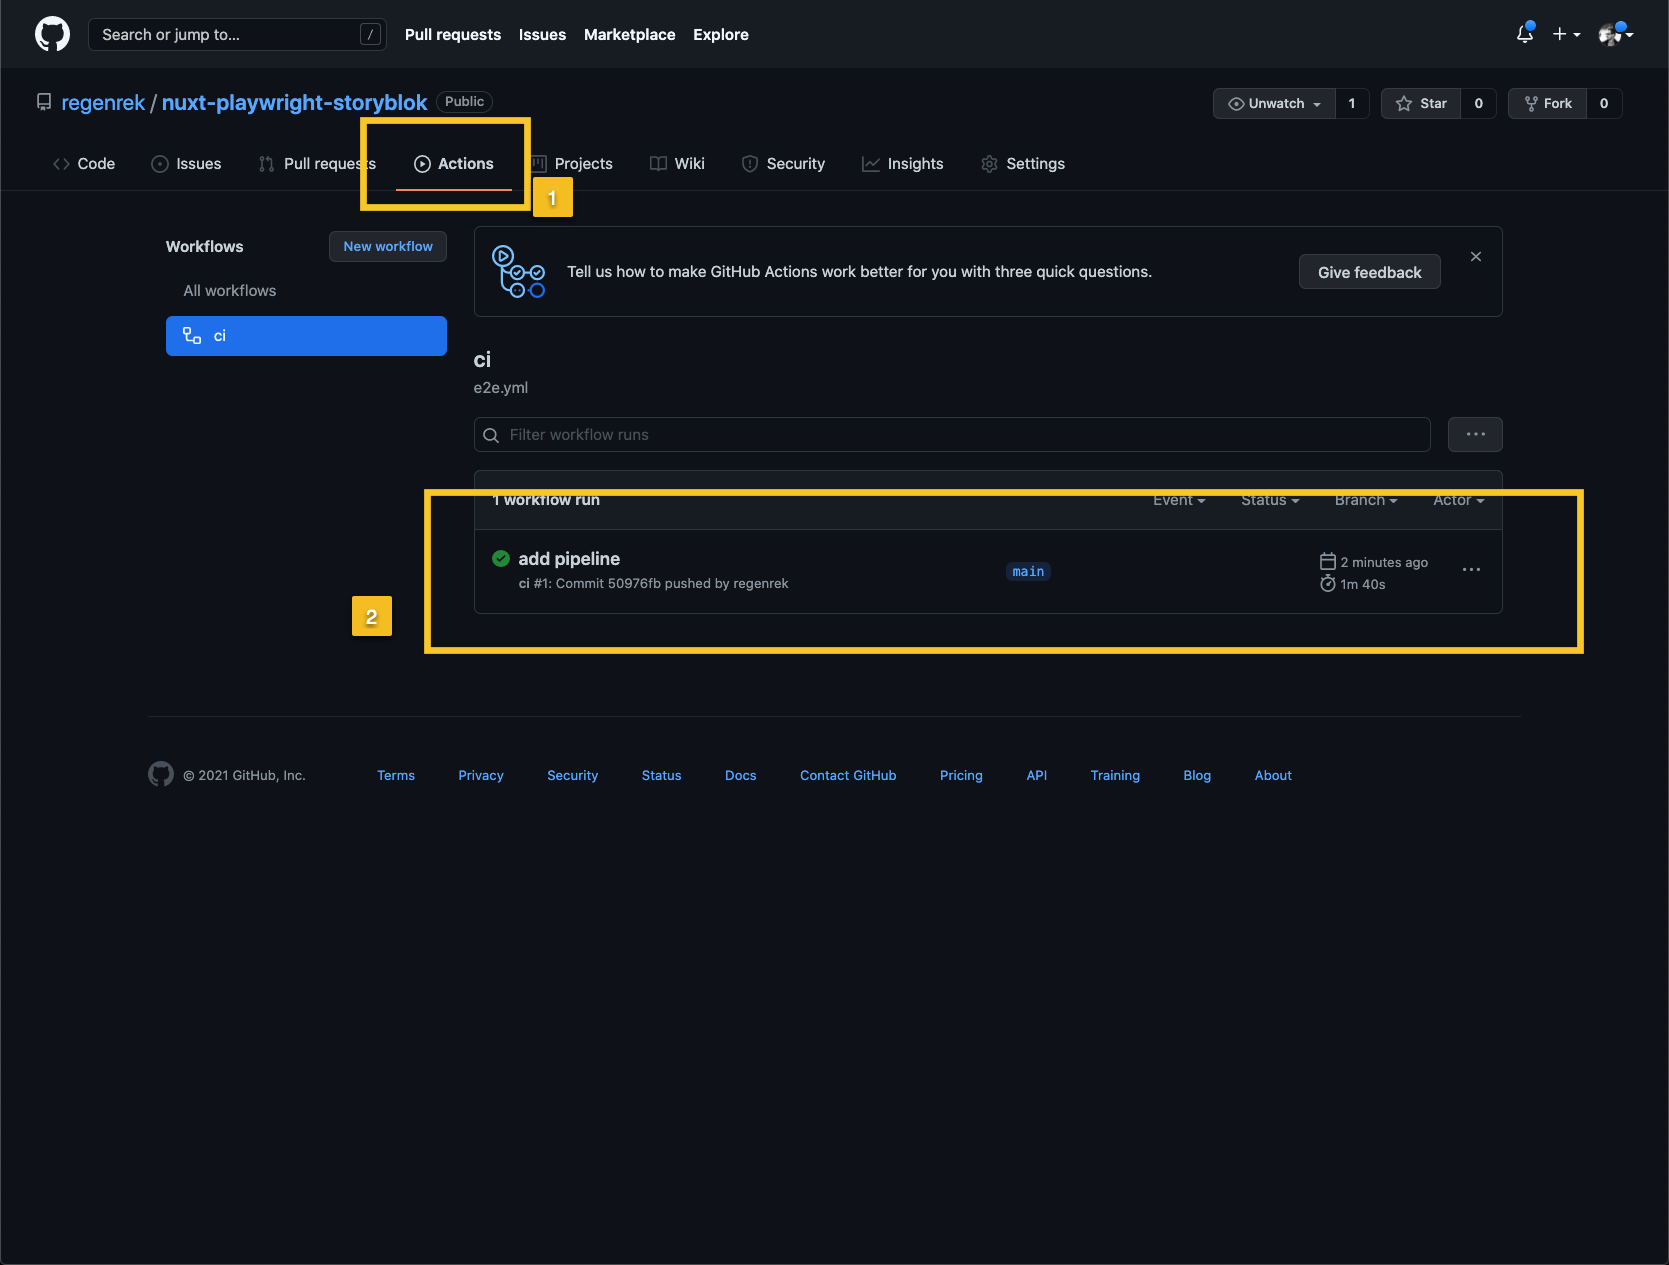
Github introduced Github Actions a while ago where you can setup some infrastructure to bring in automation stuff. There are dozens of tutorials out there how you can start with github Actions and so on. We will do it very quick here to achieve the following workflow.
- Push code to the repository.
- Github Action gets triggered and runs our test.
Add the following file to your project
project/
--| .github/
-----| workflows
--------| e2e.yml
Voila. You have now a pipeline running which always gets executed if you update your codebase. 🎉
- 📝
.github/workflows/e2e.yml
name: run e2e tests

on:
  push:
    branches:
      - main
  pull_request:
    branches:
      - main

jobs:
  test-e2e:
    runs-on: ${{ matrix.os }}

    strategy:
      matrix:
        node-version: [14.x]
        os: [ubuntu-latest]
      fail-fast: false

    steps:
      - uses: actions/setup-node@v1
        with:
          node-version: ${{ matrix.node }}

      - name: checkout
        uses: actions/checkout@master

      - name: Get yarn cache directory path
        id: yarn-cache-dir-path
        run: echo "::set-output name=dir::$(yarn cache dir)"

      - uses: actions/cache@v2
        id: yarn-cache
        with:
          path: ${{ steps.yarn-cache-dir-path.outputs.dir }}
          key: ${{ runner.os }}-yarn-${{ hashFiles('**/yarn.lock') }}
          restore-keys: |
            ${{ runner.os }}-yarn-
      - name: Install dependencies
        run: yarn

      - name: Test
        run: yarn test

      - name: Coverage
        uses: codecov/codecov-action@v1
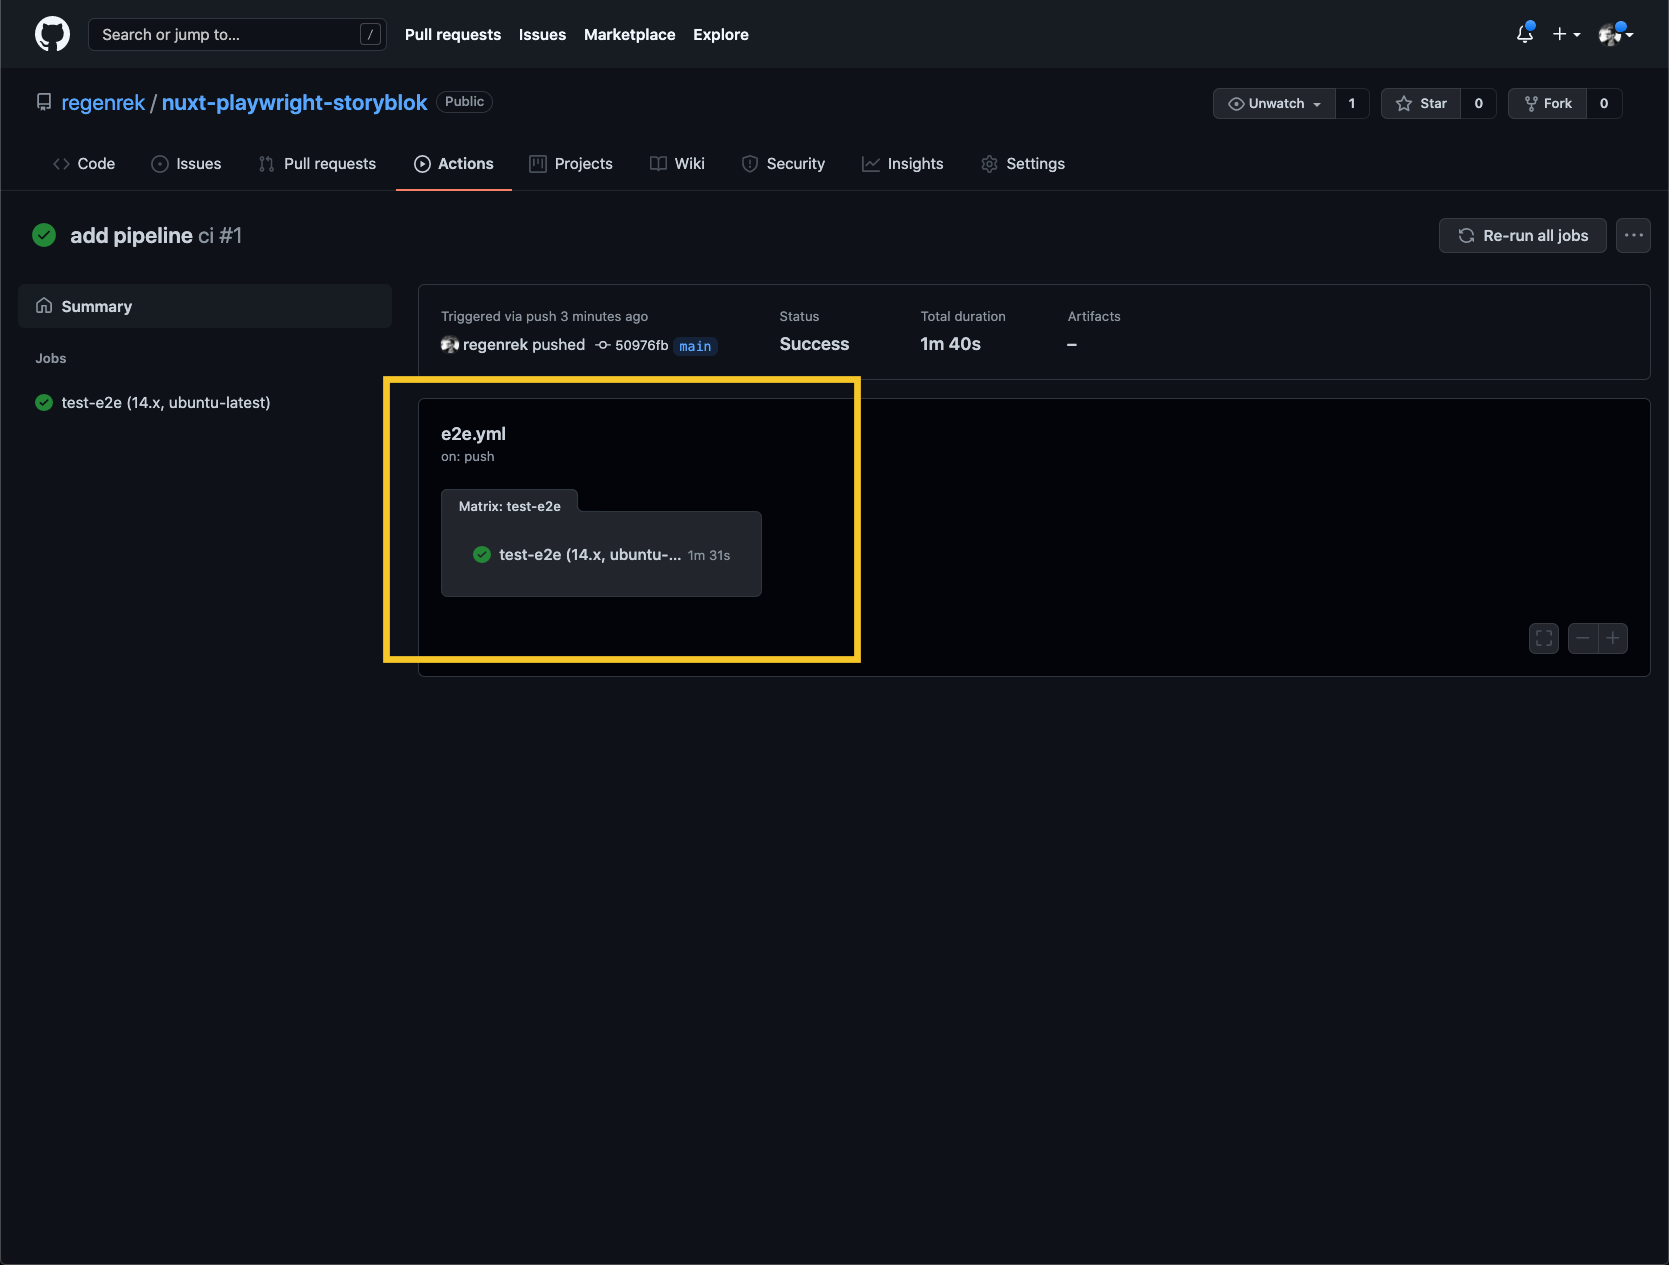
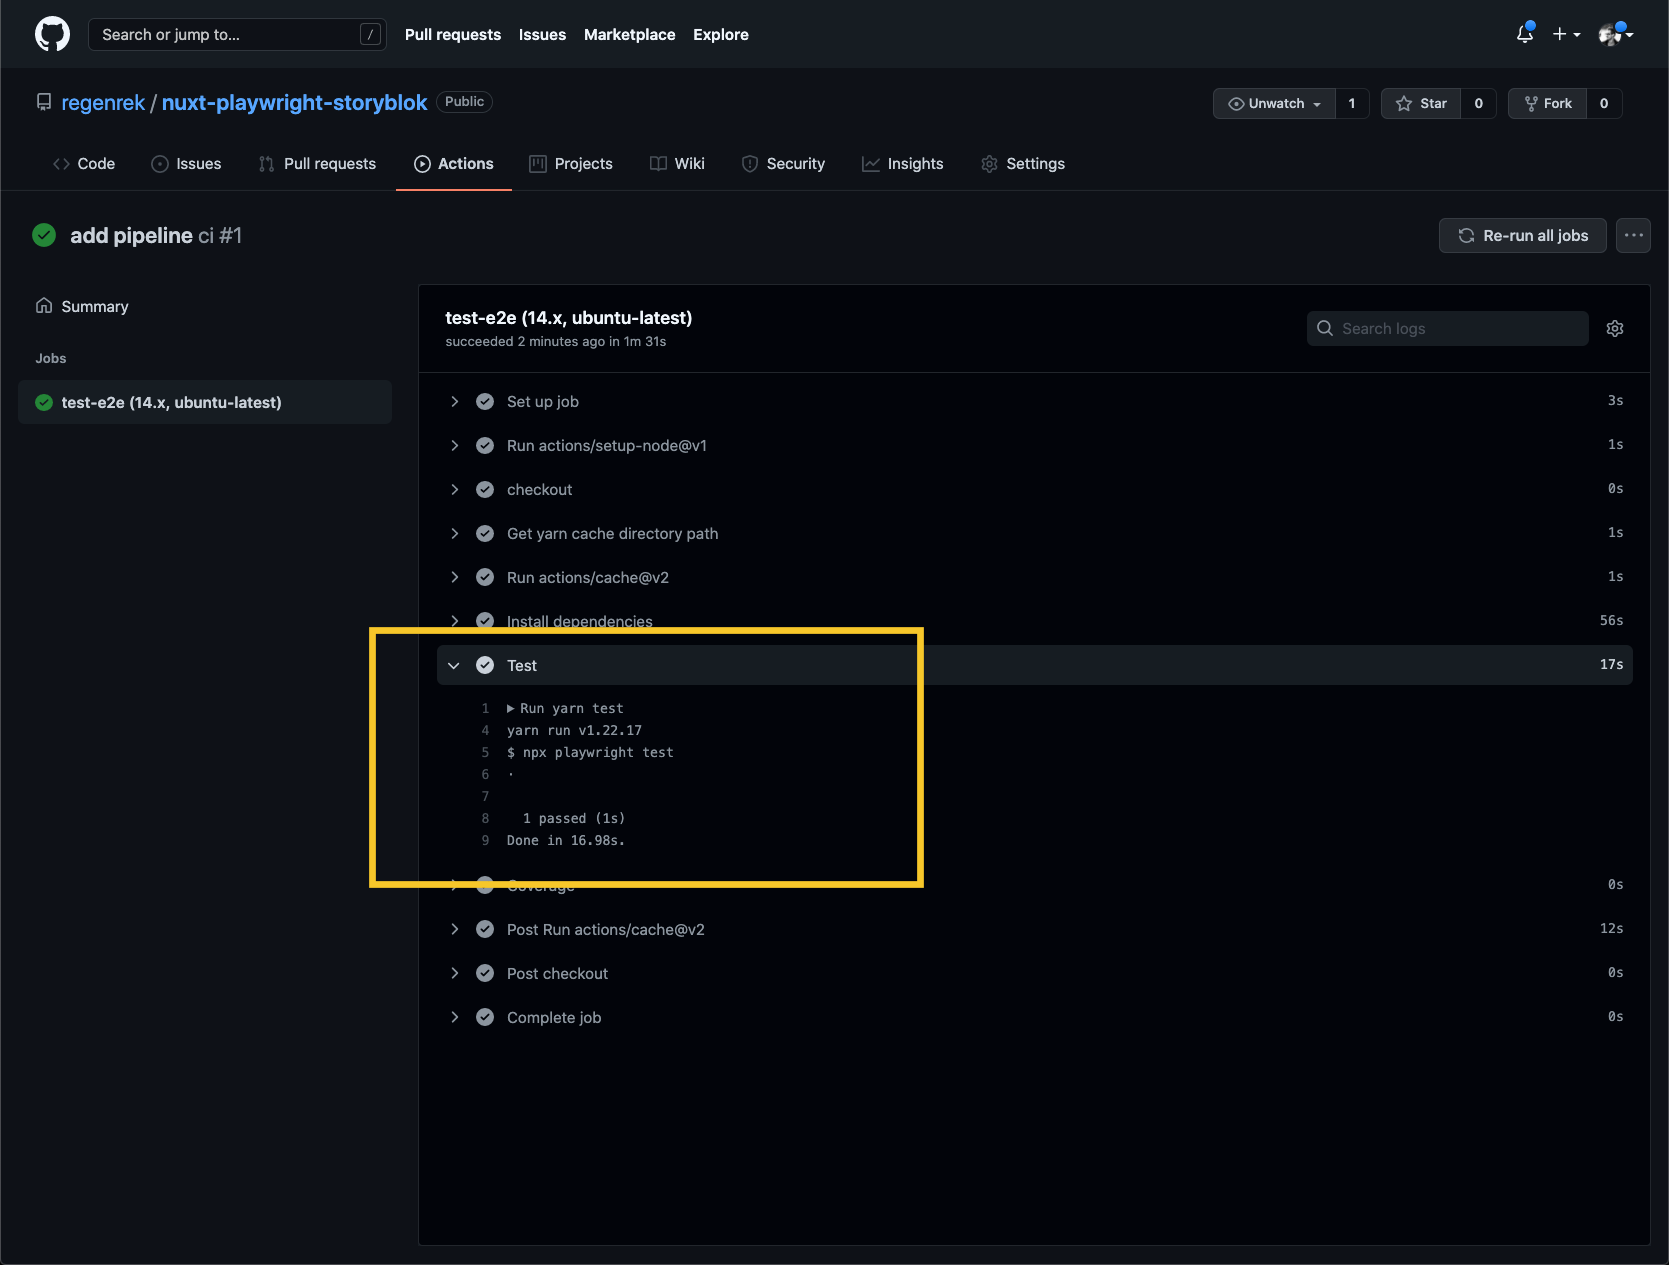
If you push now the file to your repository you can see that the github action is running


BONUS: Using nuxt/test-utils to test your nuxt apps
Note: In this guide we primarly focus on browser testing and use playwright test runner to setup our tests. So we didn't talk much about nuxt/test-utils.
First lets examine when you should use nuxt/test-utils.
- Nuxt module testing
- Unit testing (or just vue/test-utils with jest)
Browser testing(Use playwright test runner)
Anyway I will bring here a simple guide how to install and use Nuxt Test Utils Module .
yarn add --dev playwright jest @nuxt/test-utilsCreate a jest.config.js in your root directory and add the following.
module.exports = {
  preset: '@nuxt/test-utils'
}
Create a page.spec.js in the test/e2e directory and write your first test.
- In the first line we import setupTest
- we use
createPagefromplaywrighttest framework to call our homepage with the route/.
Under the hood, Nuxt test utils uses playwright to carry out browser testing. But as I already mentioned use the playwright test runner.
import { setupTest, createPage } from '@nuxt/test-utils'

describe('browser', () => {
  setupTest({ browser: true })

  it('renders the index page and show title', async () => {
    const page = await createPage('/')
    const html = await page.innerHTML('body')

    expect(html).toContain('Job Board')
  })
})
For a test run we need to add a test script to package.json.
  "scripts": {
    // other entries
    "test": "jest ./test"
  },
This should give you green lights.
yarn test PASS test/e2e/page.spec.js (12.168 s)
browser
✓ setup nuxt (11395 ms)
✓ renders the index page and show title (316 ms)I love getting feedback! If you have any questions you can ask me in the comment section below or on twitter @kregenrek
Happy Coding! 🙌 🎉
